There are the following necessary steps to set up miTT Wallet PUSH:
- Joomla Backend
- Joomla Frontend
- Apple Developer Program
- Team ID
- Pass Type ID
- Signing Request
- signerCert.pem - signerKey.pem
- APN Certificate
- Authkey ID
- Upload Certificates and Data
miTT Wallet Push Joomla Backend
First, you have to set up the data, which is necessary to communication between servers.
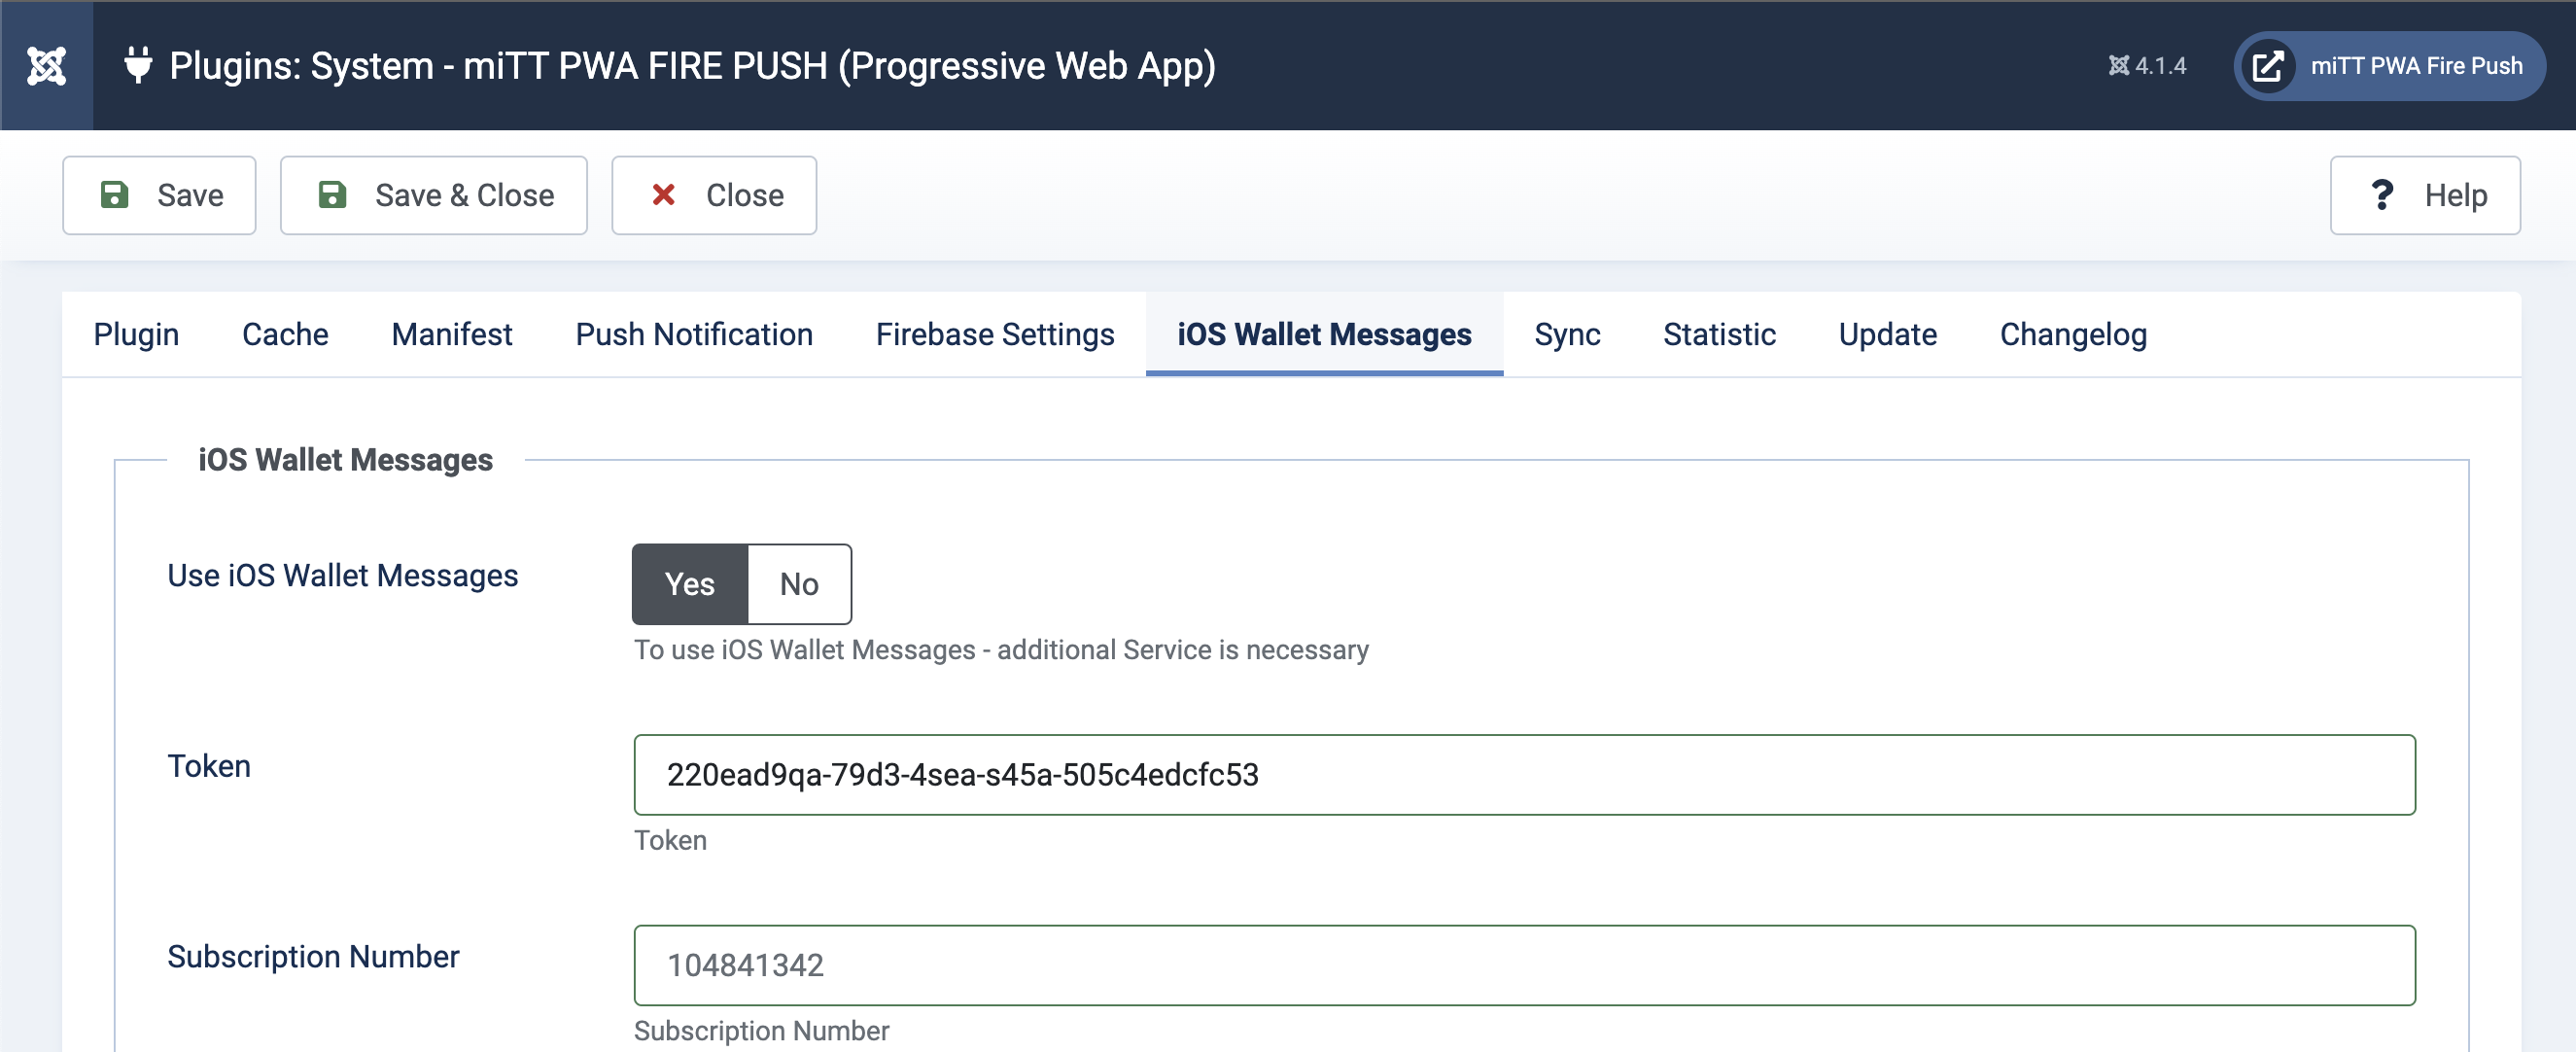
Grab the subscription number und token from the dashboard.
Layout Wallet Pass
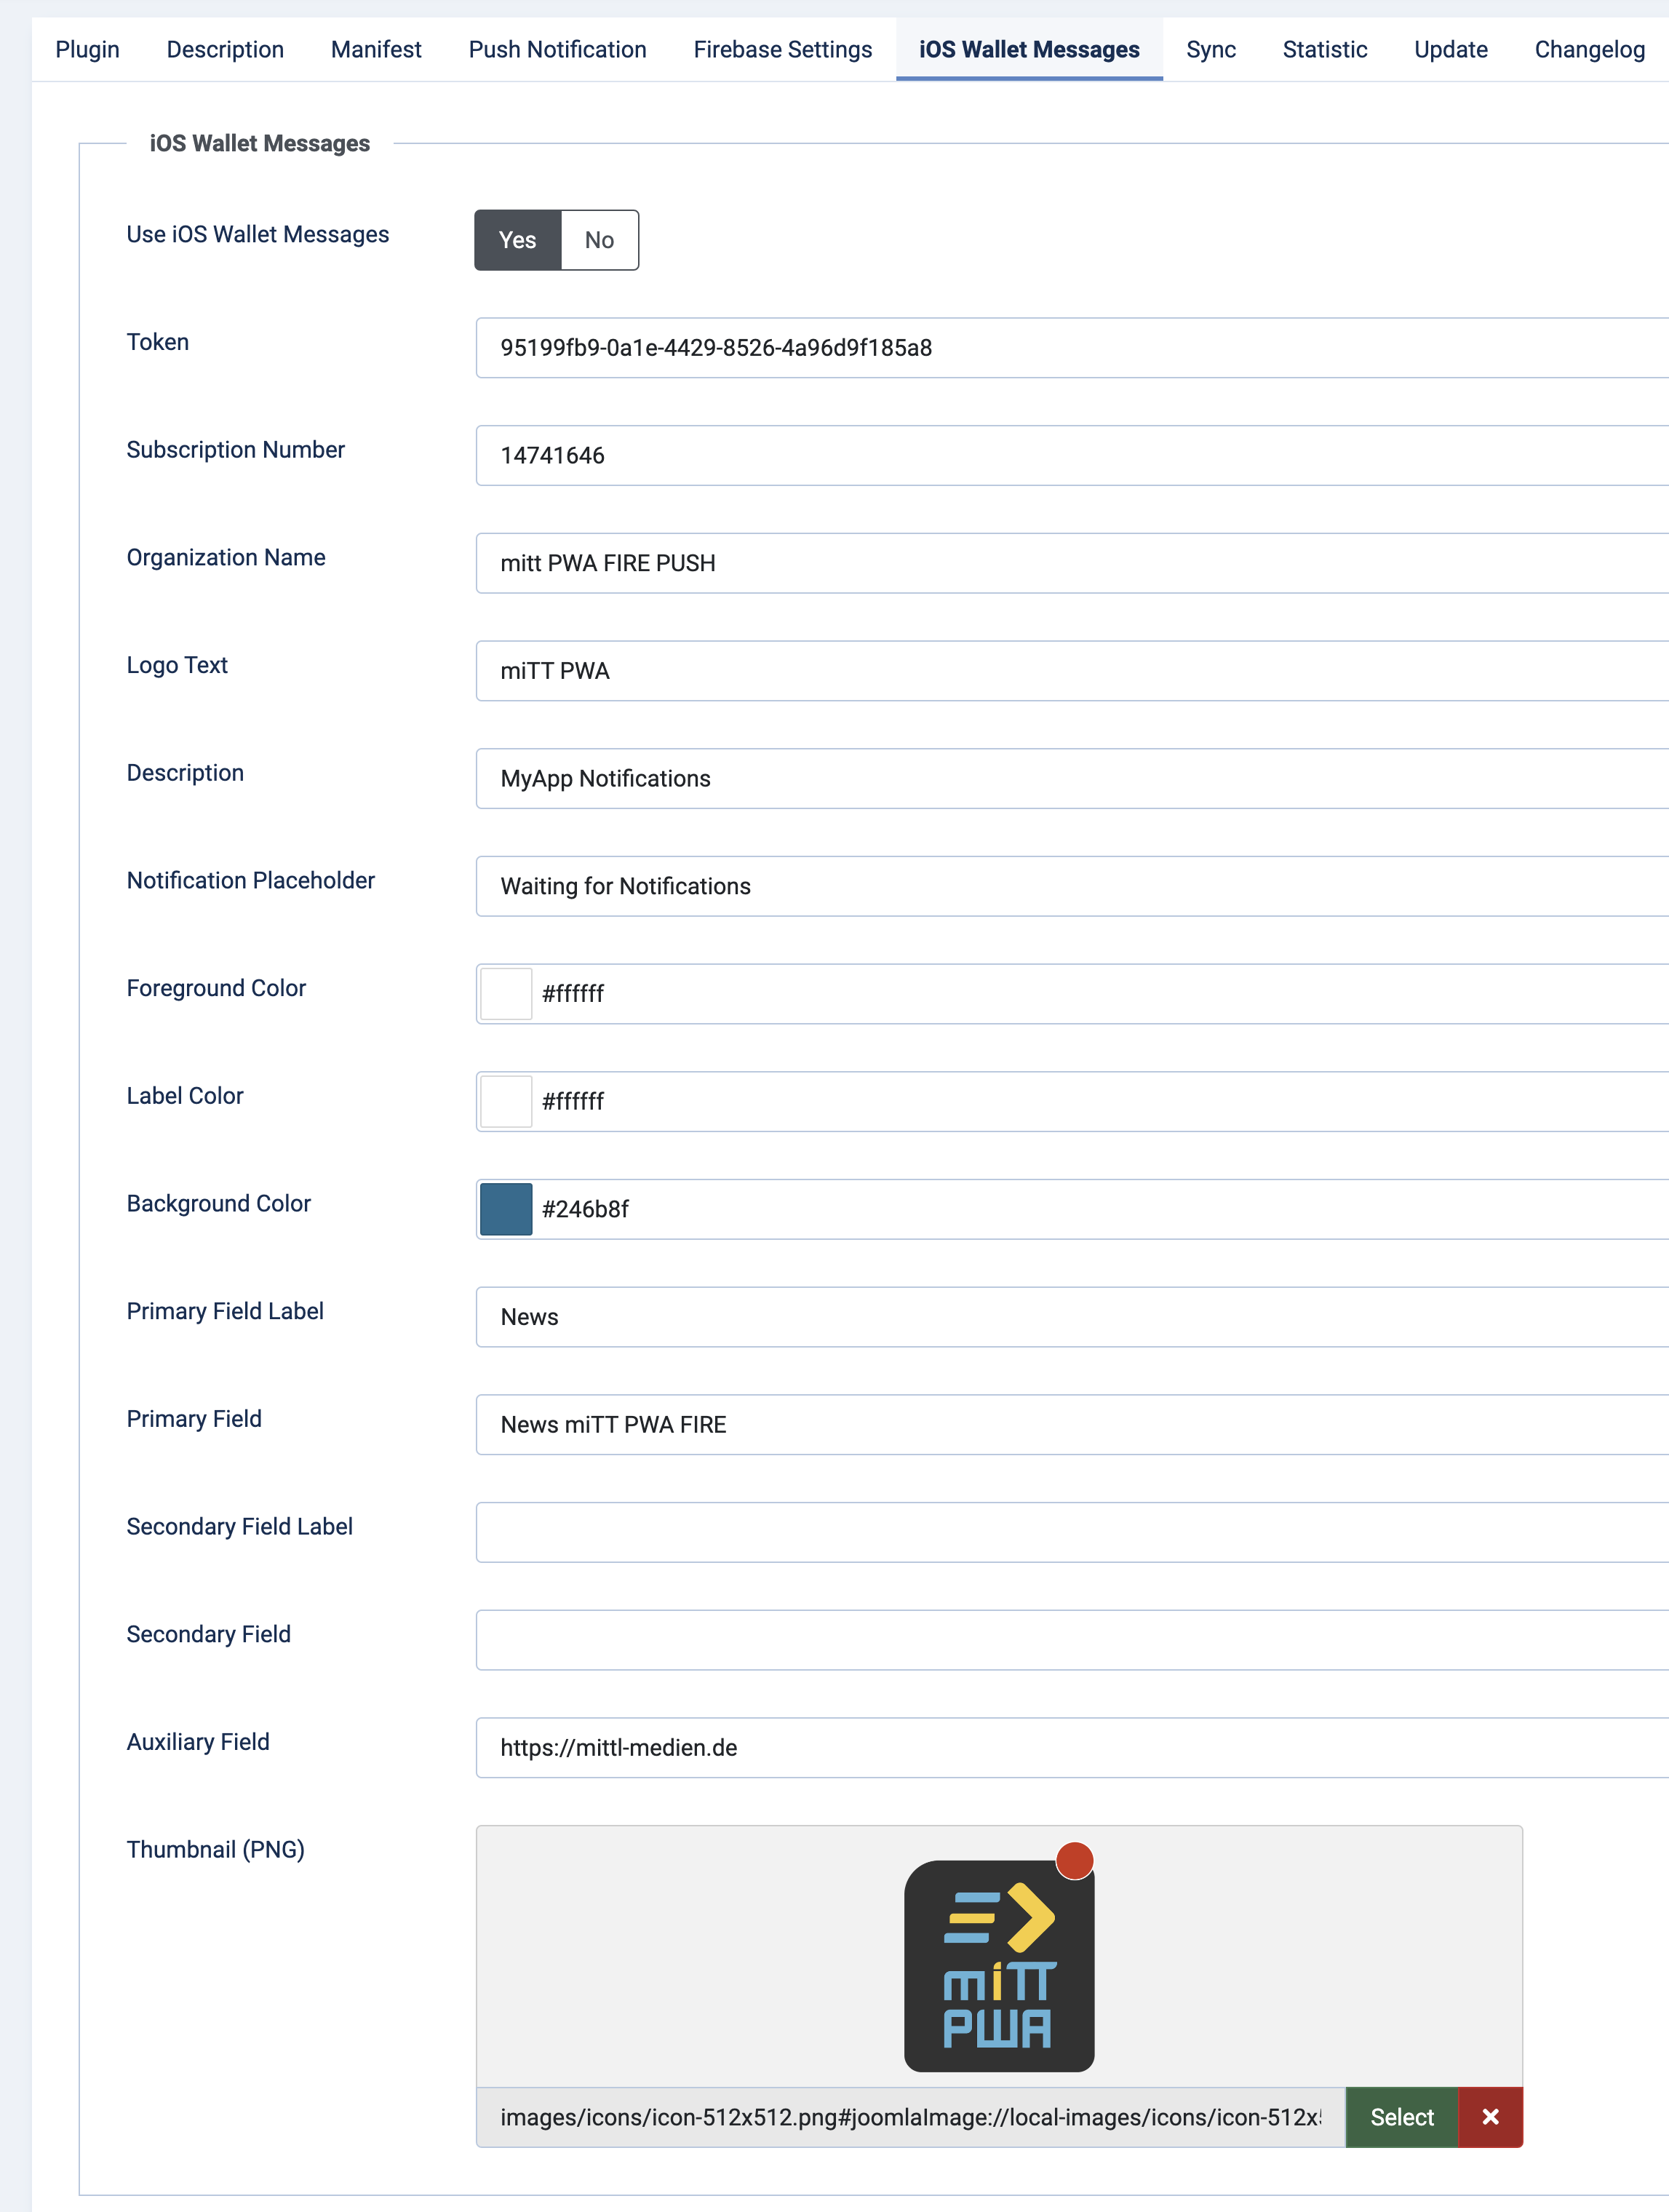
A full documentation, where the field will display you will find in the section of Generic Pass as follows: Apple Wallet Layout Documentation
Joomla Frontend
In the frontend, you need to integrate the Apple Wallet Pass button where the user has the option to add the pass. Here are the Apple Wallet Guidelines
which are to be observed. Please add the button the CSS class="mittpwa__ios__subscribe".<img class="mittpwa__ios__subscribe" src="images/button-one-line-large_2x.png" alt="Apple Wallet Push" width="250px" height="auto" loading="lazy" data-path="local-images:/button-one-line-large_2x.png" />You can download the button or image for the button from the Apple site. An example to integrate you find on the my sample page firepush.mittpwa.app
Apple Developer Account
To continue, an Apple Developer Account is required to get all data.
At the dashboard you find at your subscription the following button to get an overview of needed data and certificates:
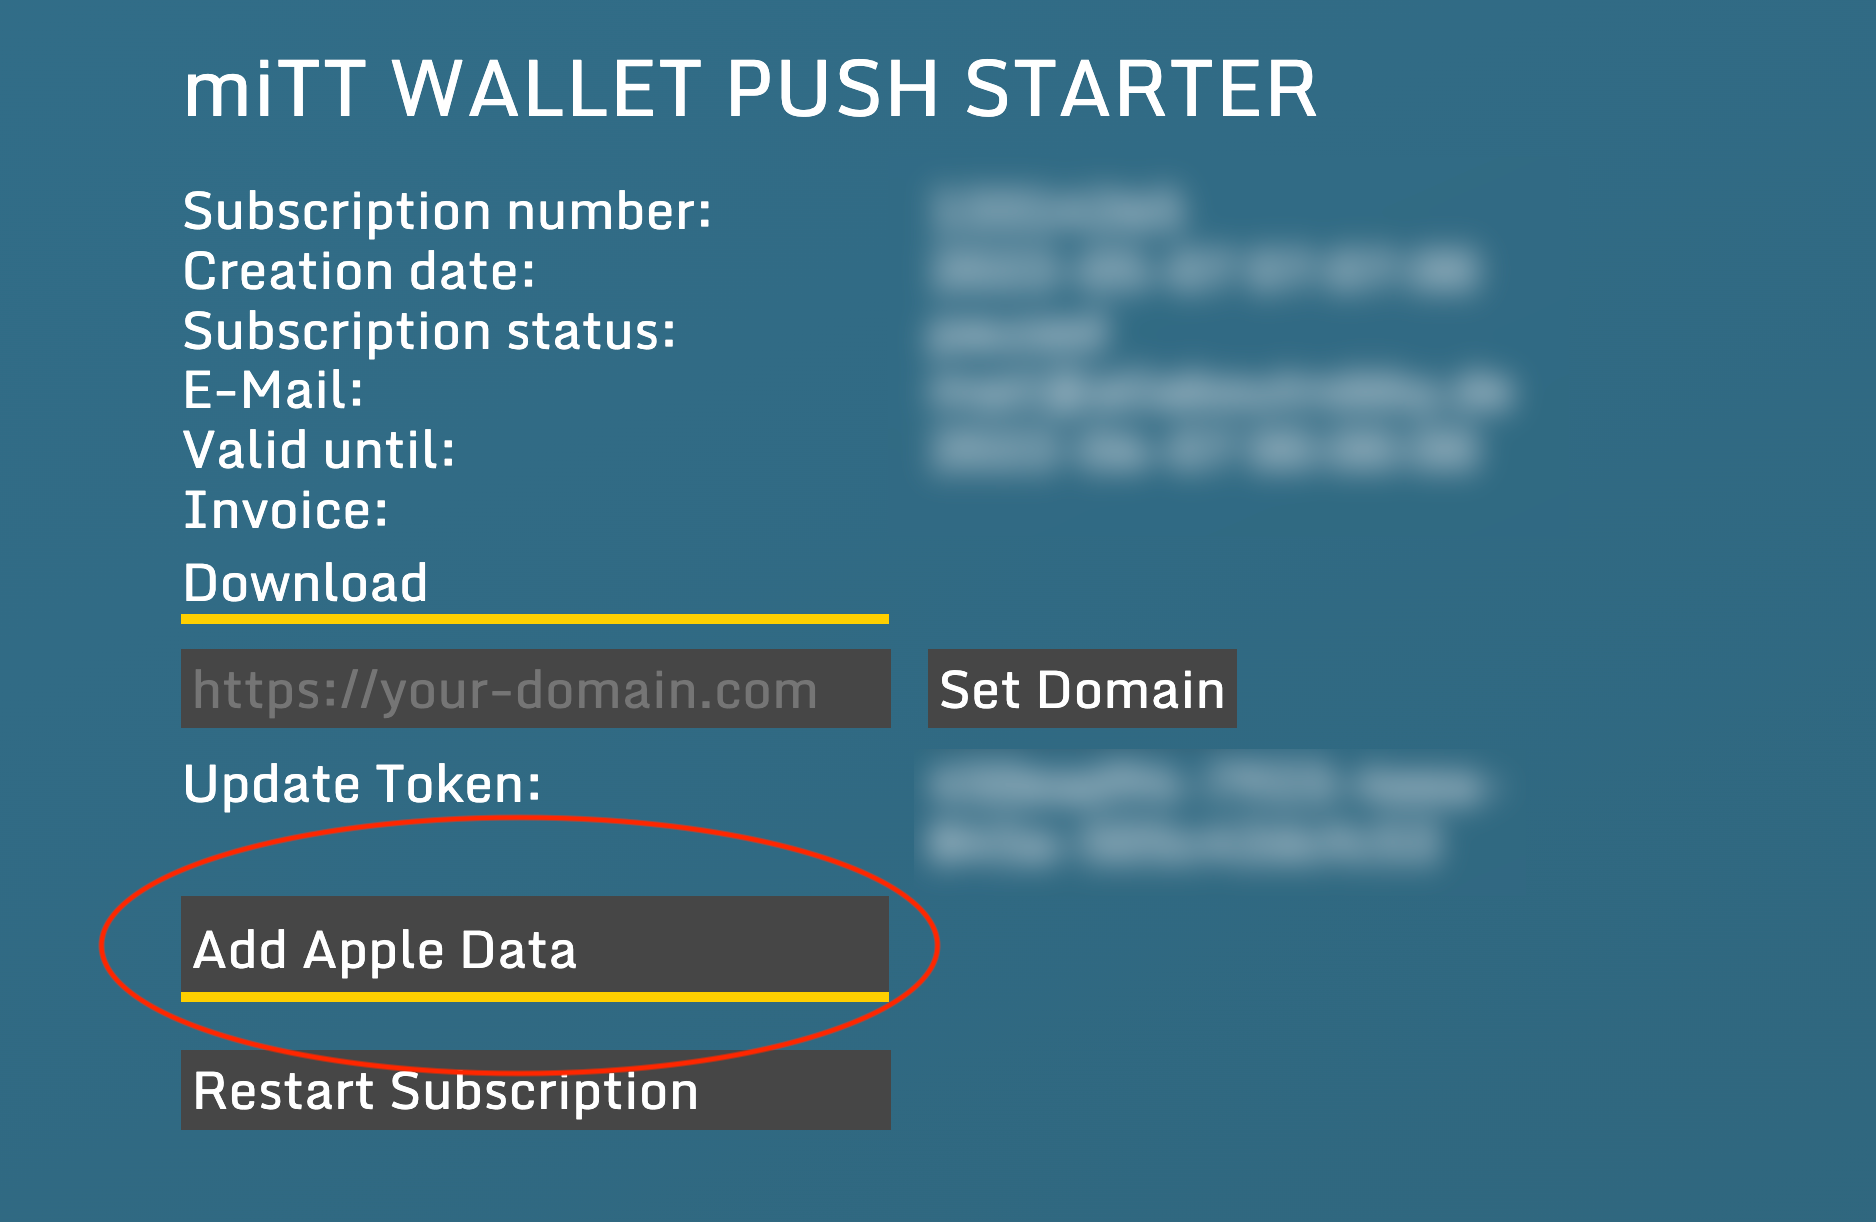
This form show, which data is needed.
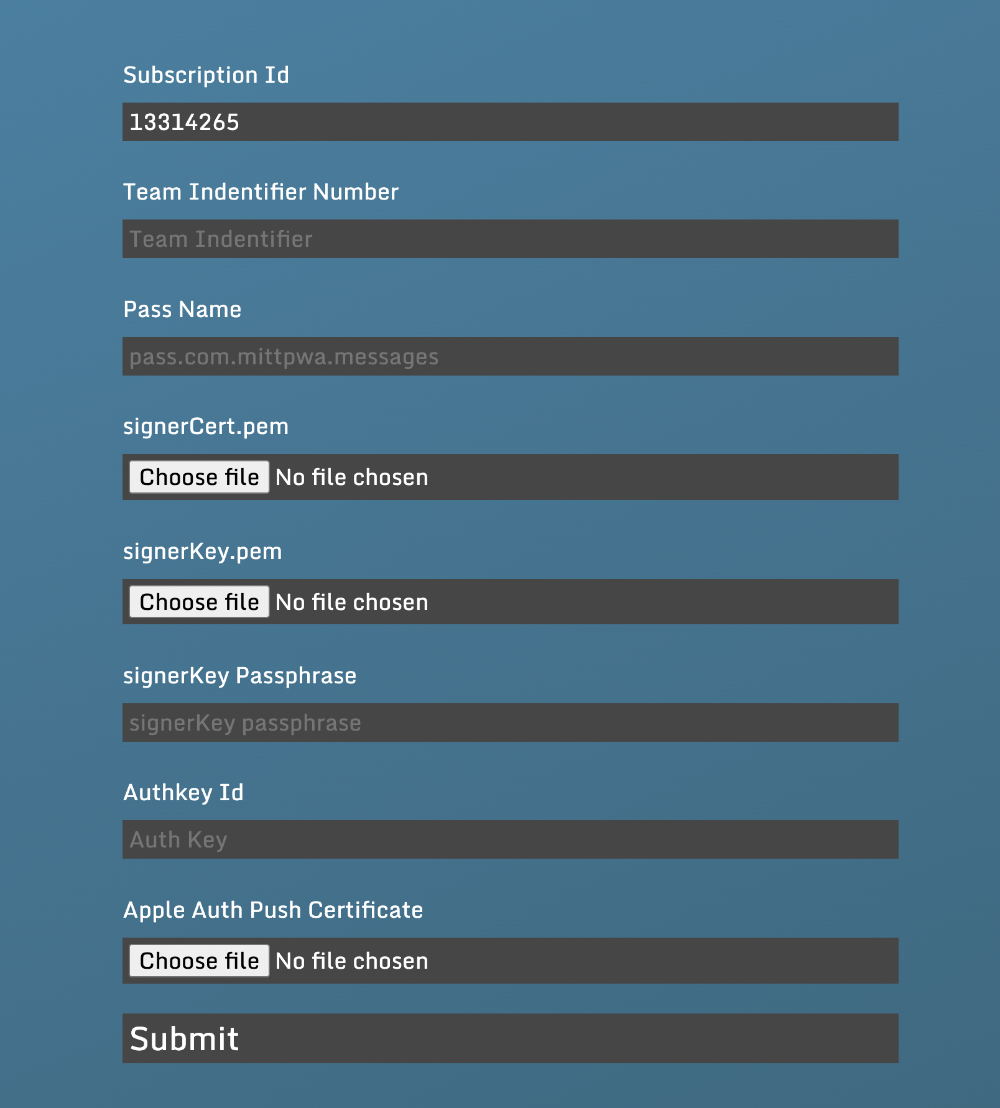
The "Subscription Id" is prefilled.
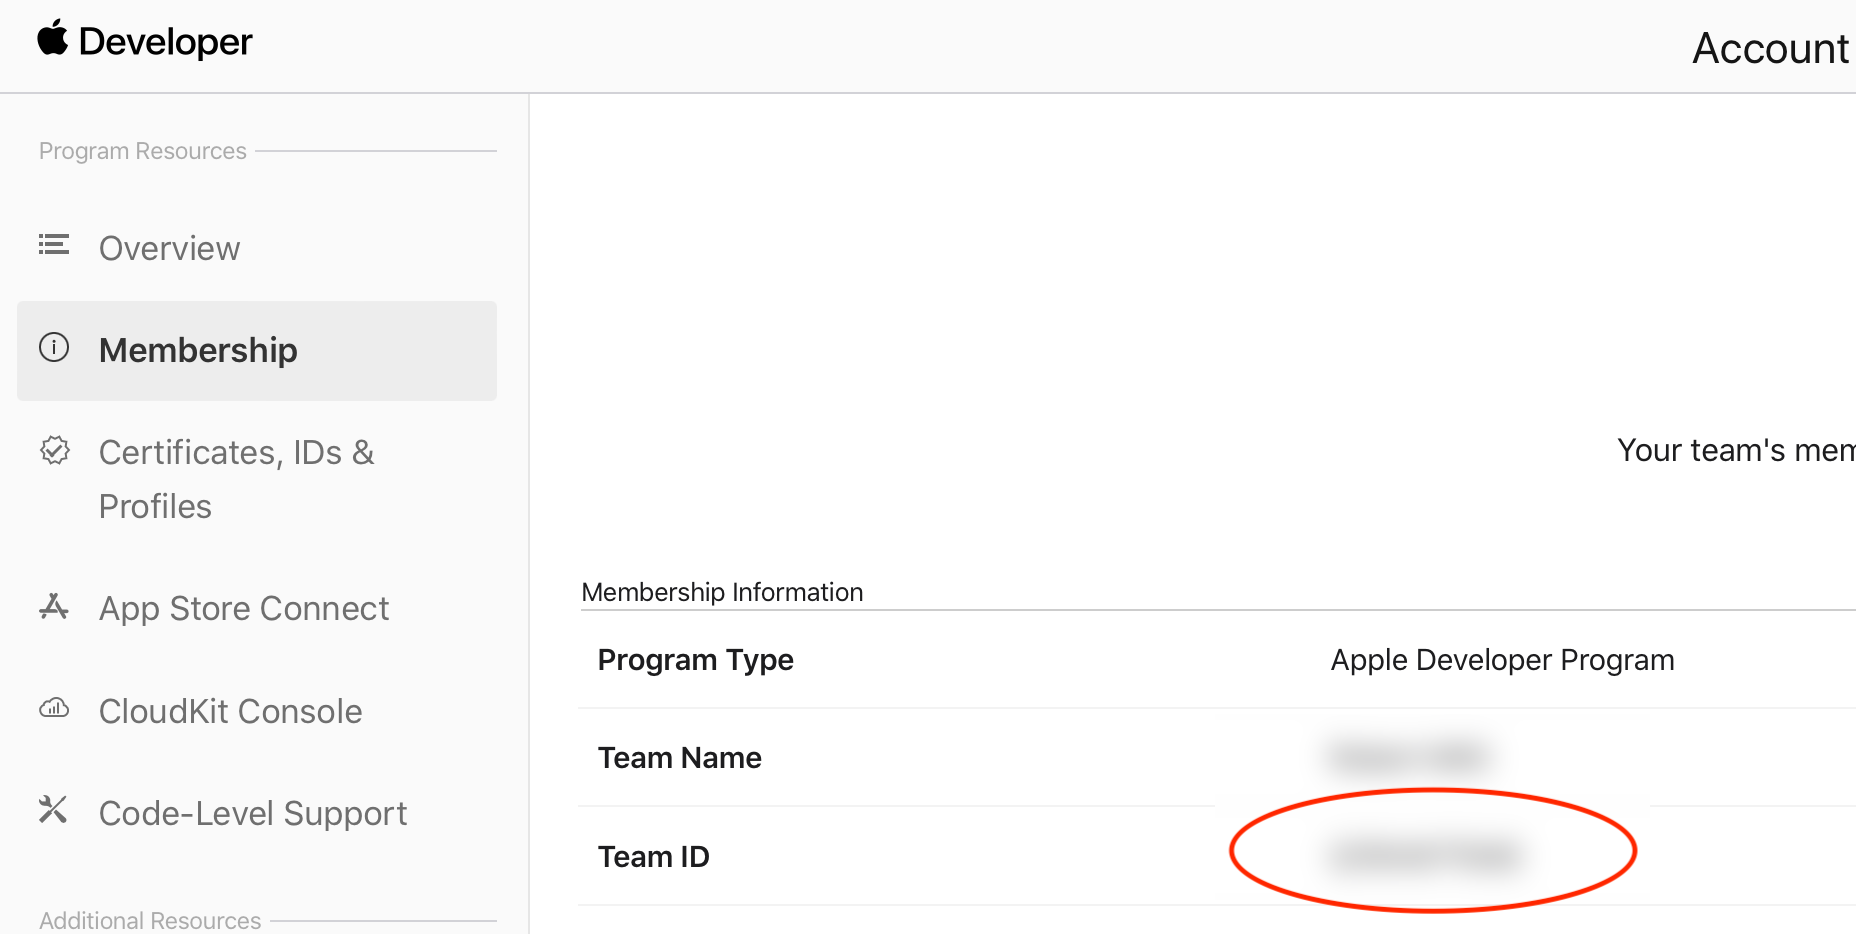
Team Id
Your Team Id will you find on the top bar on the right site or on your Membership Detail Site at your Apple Developer Account.
Pass Type Id
1. Register a new Pass Type Id . Use the following format for it as in the description like pass.com.example.appname and write it down.

2. Confirm the new identifier
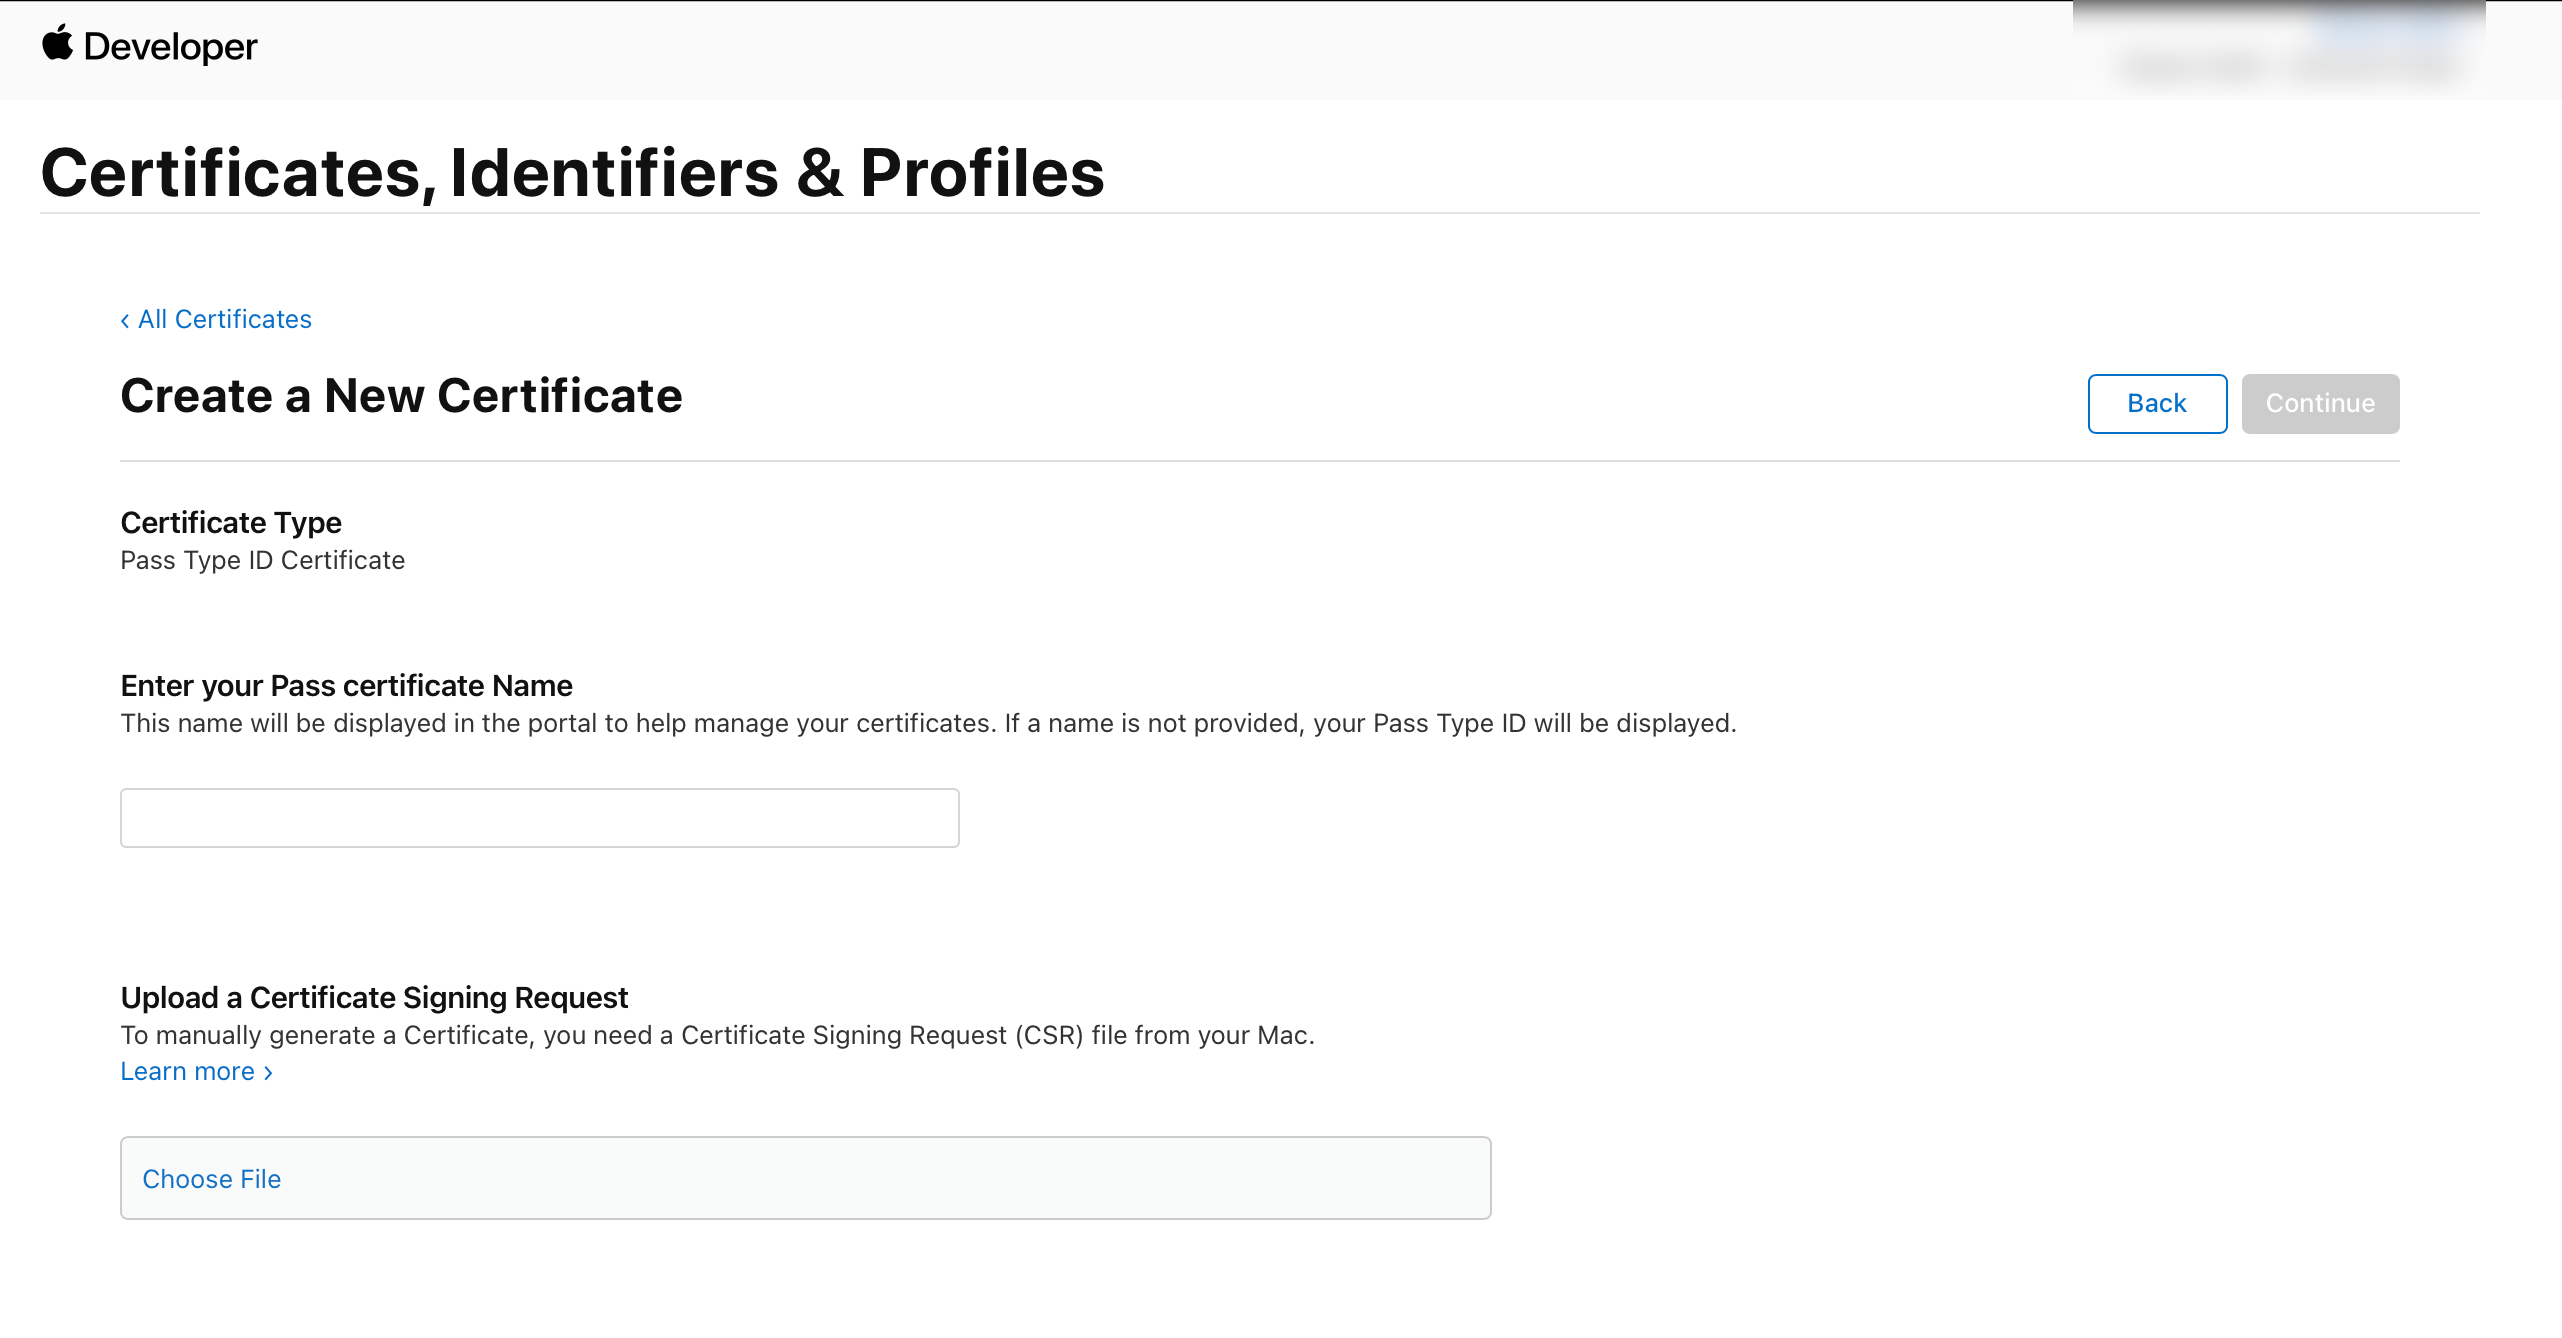
3. Edit it, create certificate
Signing Request
Then you have to upload a Signing Request To do this, please follow these steps:
Apple Signing Request
If you don't have a Mac, then you could use the following service like appcircle.io.
Then you could upload the Signing Request and finish to create the certificate. After creating, download the certificate from Apple Developer as pass.cer.

Certificate signerCert.pem - signerKey.pem
After downloading the certificate (pass.cer) open (import) it in Keychain Access.app. Filter for Certificates and identify it. Right click on it and export your certificate as a .p12 file. Choose a password and write it down. You will get a PKSCS#12 file (.p12).
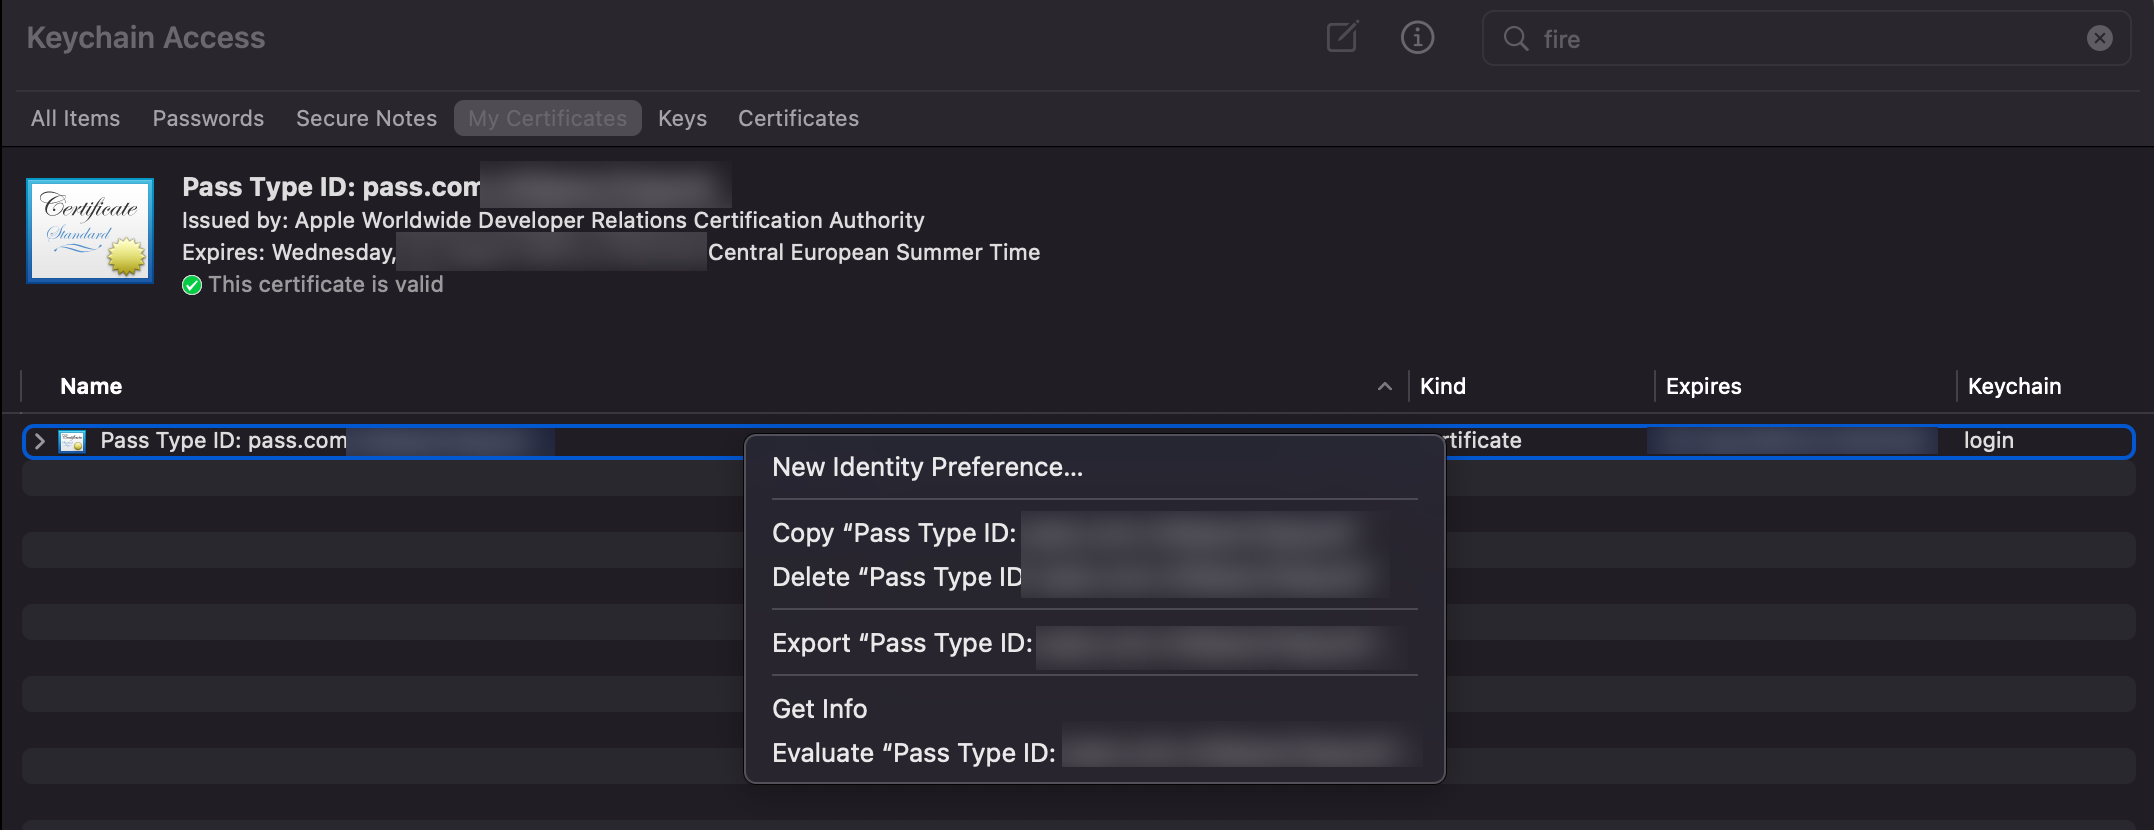
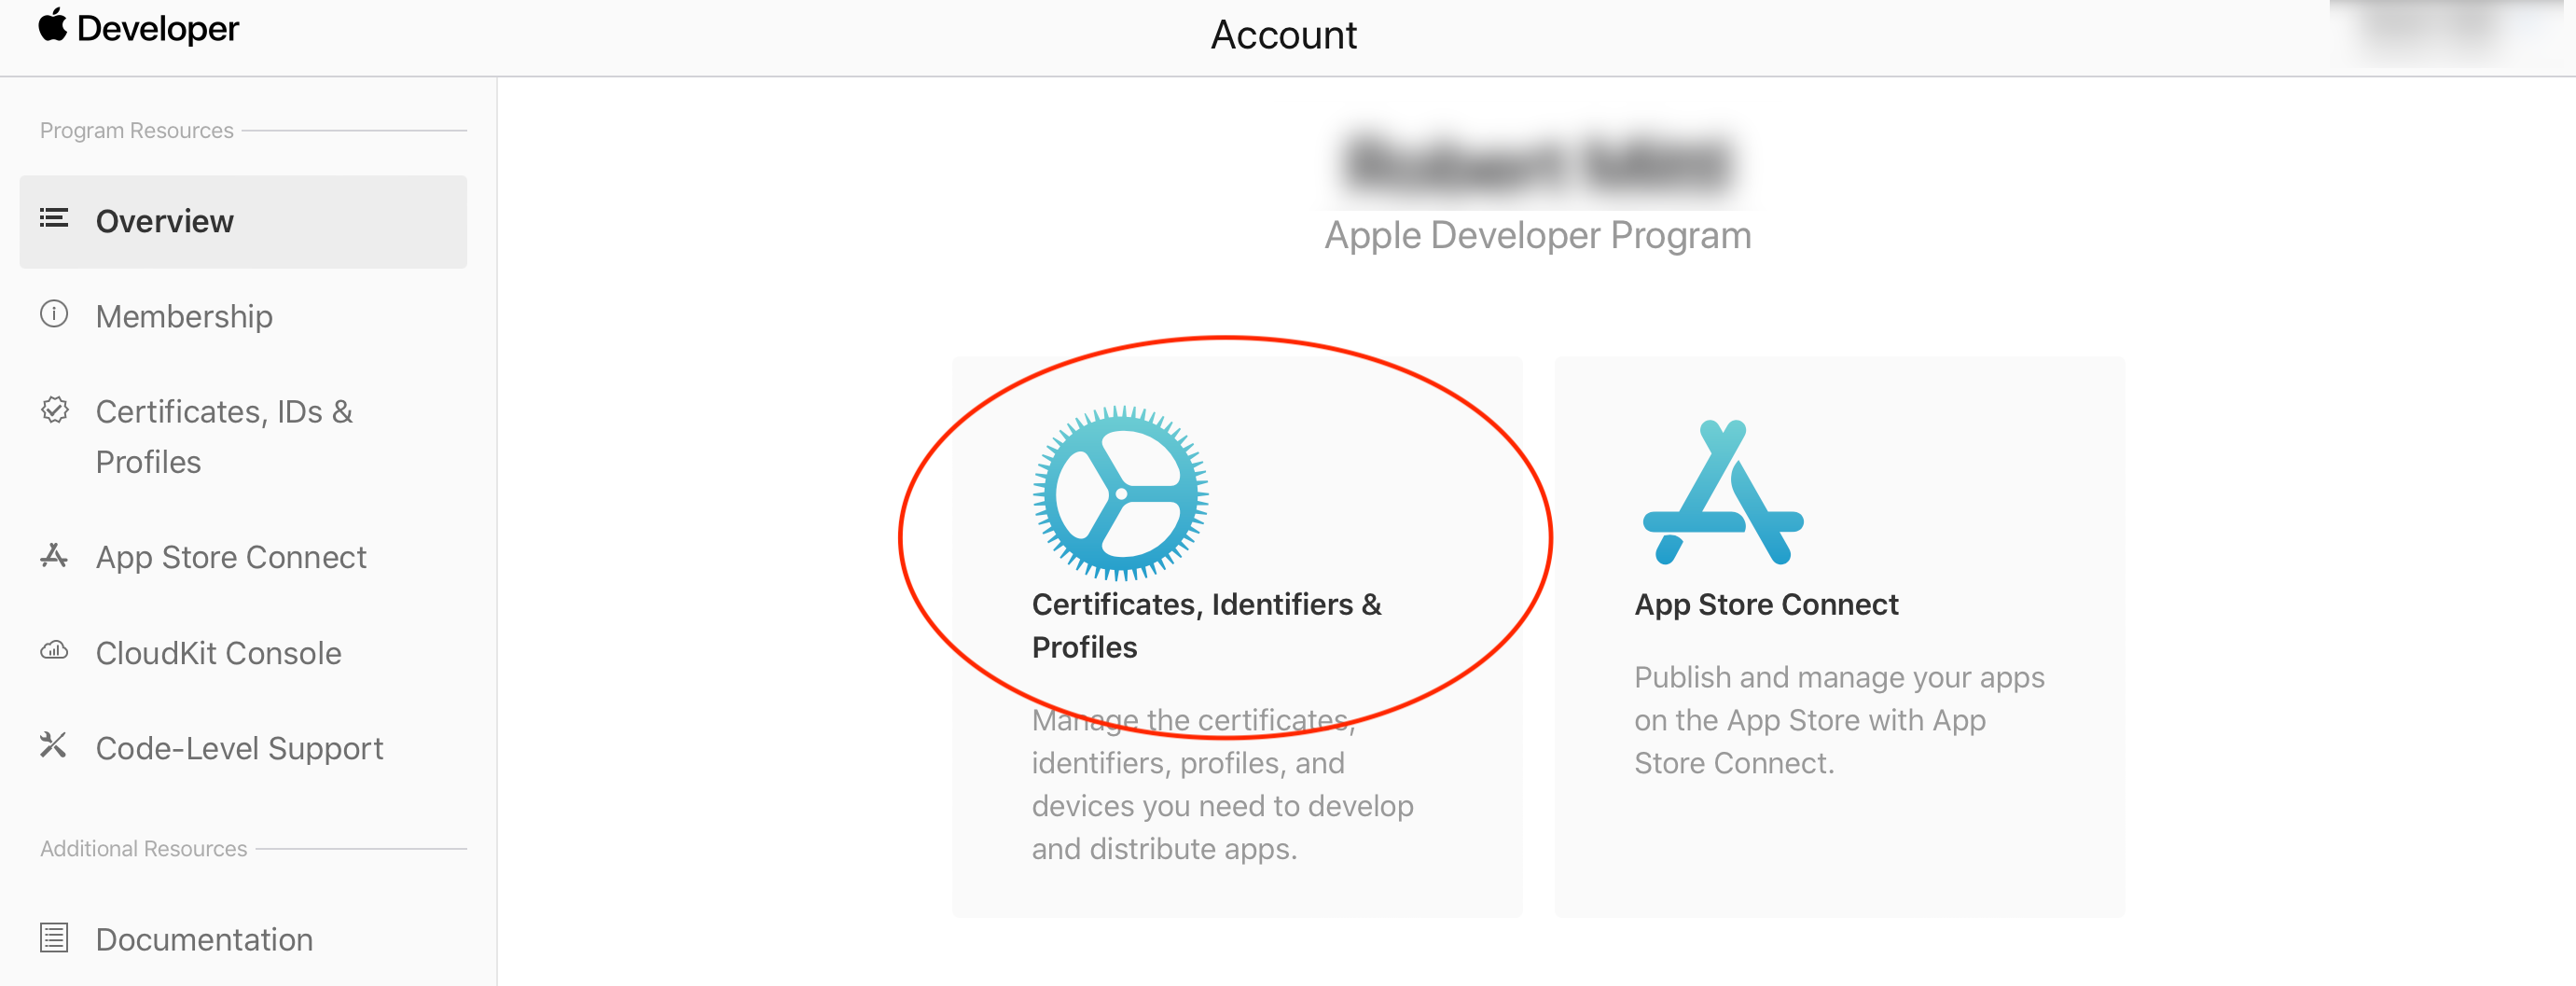
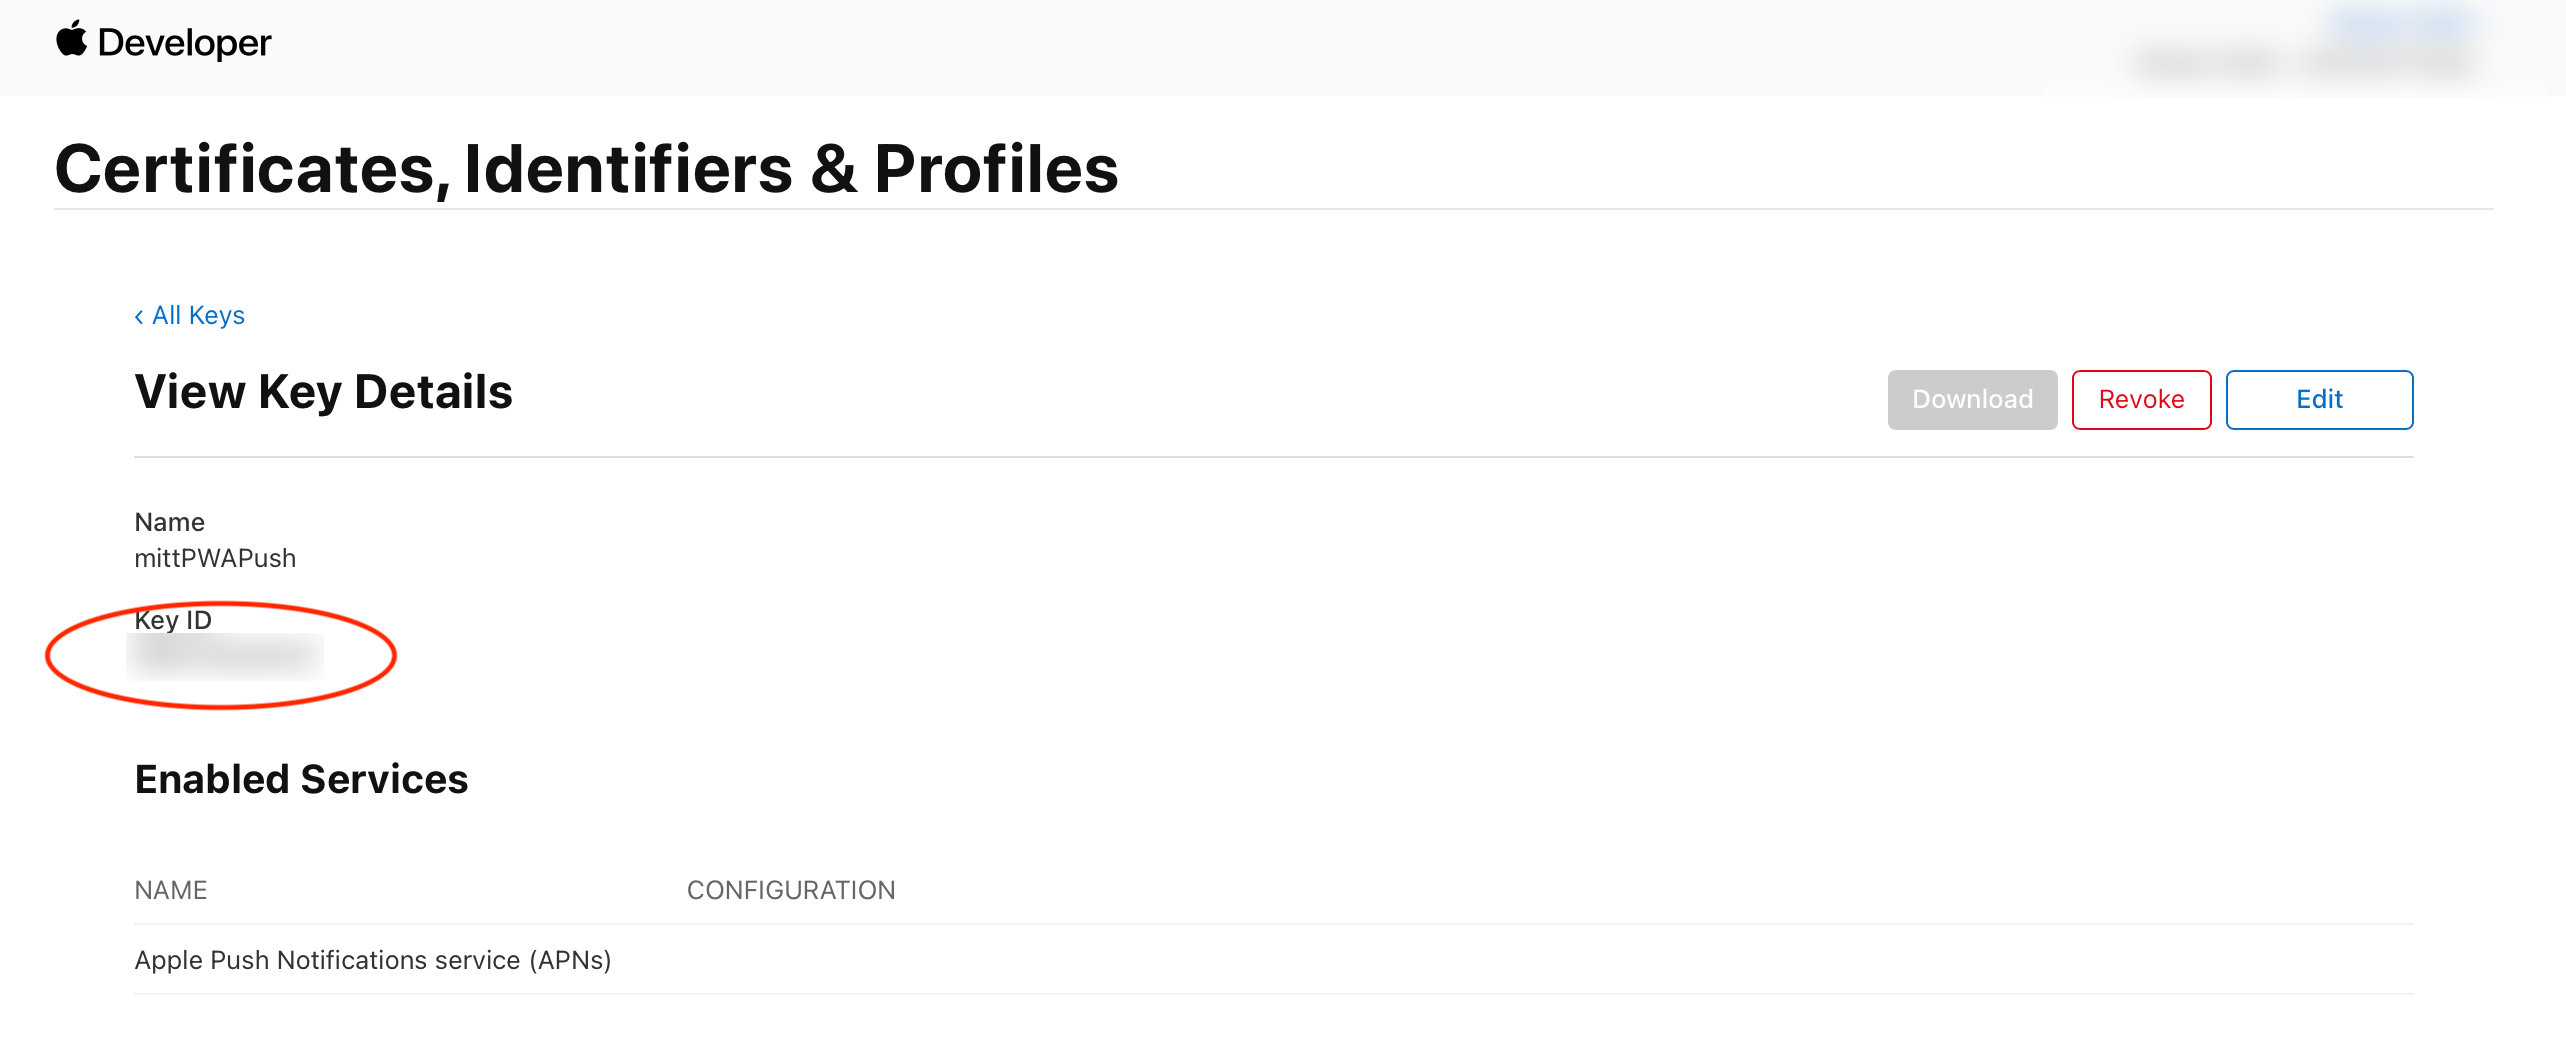
Open your Terminal, go to the exported Certificates.p12 and create the certificates "signerCert.pem" and "signerKey.pem" with the following terminal command. For signerKey.pem set the Last step is to create iOS APNs Auth Key. Go to your Apple Developer Account Page again. 1. Choose Certificates, Identifiers & Profiles. 2. Select Keys 3. Register and Download it. After download it, it could be not re-download. Please ensure you have it on a safe place. Please save your Certificates on your Computer on a safe place. Please ensure, that the certificate are named as openssl pkcs12 -in Certificates.p12 -clcerts -nokeys -out signerCert.pem openssl pkcs12 -in Certificates.p12 -clcerts -nokeys -out signerKey.pem -passout pass:APNs Certificate

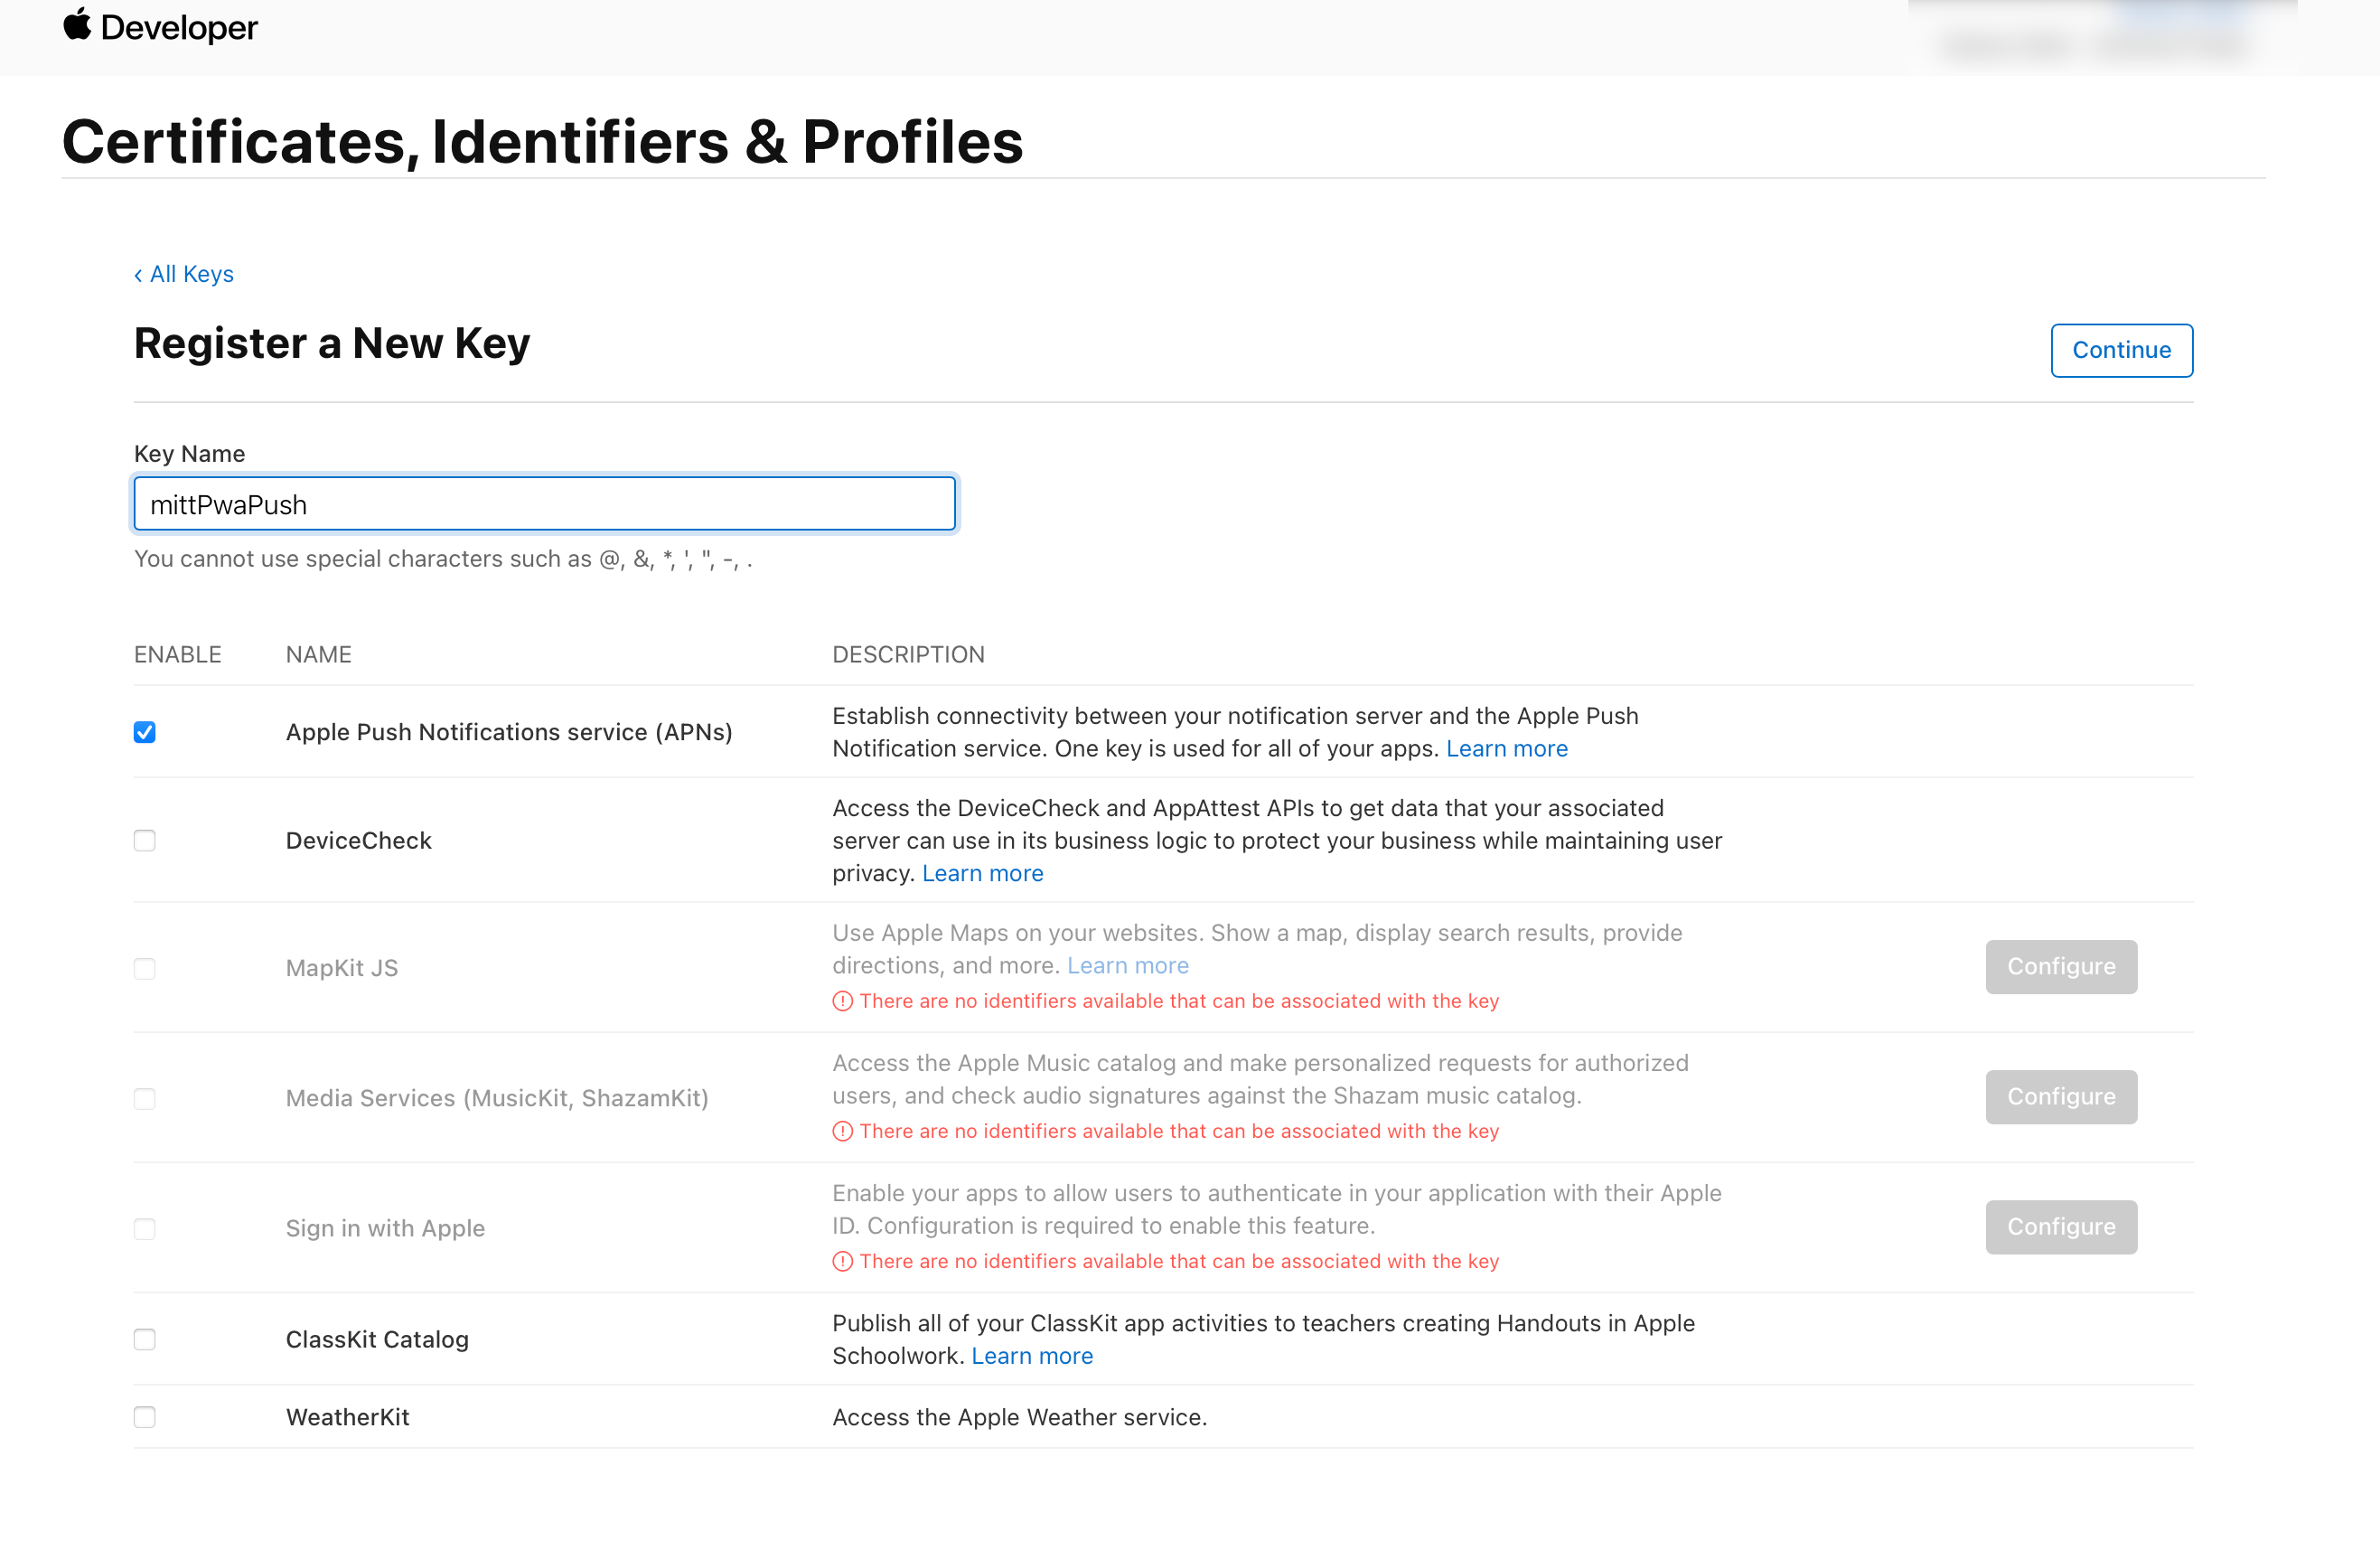
Authkey ID
Upload the certificates
Then you could upload your certificates and data as mentioned before at the Dashboard and press the button "Add Apple Data"

Fill out the form.

If you have any questions, please contact me by E-Mail.